#First trimester yoga pose
During the first trimester, you can maintain your usual physical activity as long as you modify appropriately. Focus on building strength and releasing tension, especially in your low back and hips. During the first trimester, you should avoid: intense backbends, twists, and forward bends strong or forceful abdominal contractions inversions (unless you’re very experienced) jumping, hopping, or bouncing hot yoga
1.Head-to-Knee Forward Bend (Janu Sirsasana)
This forward bend strengthens your back muscles, stimulates digestion, and promotes relaxation. It stretches your back, hips, and legs. Sit on the edge of a cushion, block, or folded blanket with your left leg extended. Place the sole of left foot against inner right thigh. Inhale as you reach arms overhead. Exhale to fold forward slightly, lengthening the front of your torso. Place your hands on your body or the floor. Hold this position for up to 1 minute. Repeat on the other side. Place a cushion or block under either knee for support. Avoid bending too far forward. Use a strap around the ball of your foot.Head-to-Knee Pose stretches the hamstrings, hips, and groin muscles.It is also a restorative pose that is said to help relieve stress and calm your mind.If you have menstrual cramps or menopause symptoms, this pose is one of those recommended for relief.

2.Wide-Angle Seated Forward Bend
This pose increases flexibility in your low back, hips, and legs. It builds strength in your spine, low back, and pelvis. Sit on the edge of a cushion, block, or folded blanket, with your legs out to the side, allowing your pelvis to tilt forward. Reach arms overhead. Bend at your hips as you fold forward. Place hands in front of you or take hold of your big toes. Hold this position for up to 1 minute. Modifications: Bring your legs in closer if your toes point out to the sides. Place cushions or blocks under your knees if you have tight hamstrings.

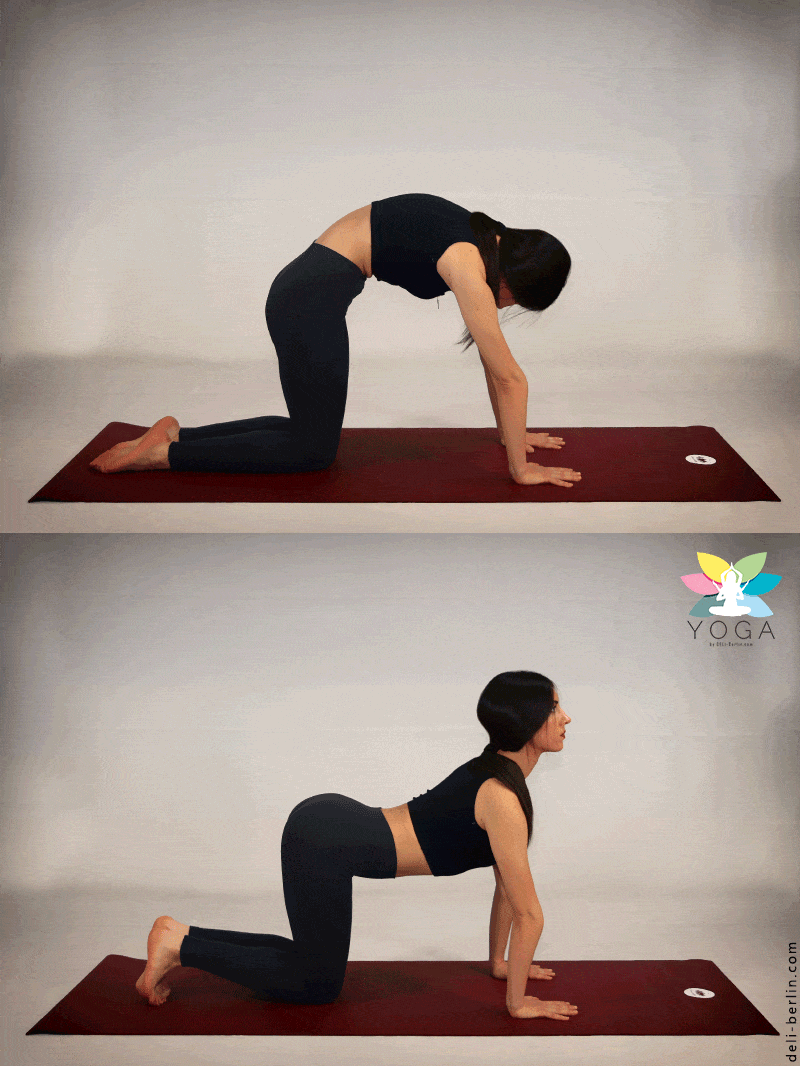
3.Cat-Cow Pose (Marjaryasana to Bitilasana)
This gentle backbend relieves tension, improves spinal mobility, and boosts circulation. You’ll feel a nice stretch in your neck, shoulders, and torso. Start on all fours. Inhale as you arch your spine, lower your belly, and gaze upward. Exhale as you draw chin into chest and arch spine upward. Continue this gentle flow for up to 1 minute.A great flow when your body needs a break. Cat-Cow, or Chakravakasana, is a yoga pose that’s said to improve posture and balance — ideal for those with back pain. The benefits of this synchronized breath movement will also help you relax and ease some of the day’s stress.

#Second trimester yoga poses
During the second trimester, your body starts to produce higher levels of the hormone relaxin. It relaxes your tendons, muscles, and ligaments to prepare your body for birth. Since this may cause you to become more flexible, be careful not to overstretch. To prevent discomfort and injury, don’t go all the way to your edge. During the second trimester, you should avoid: intense backbends, twists, and forward bends strong or forceful abdominal contractions inversions (unless you’re very experienced) jumping, hopping, or bouncing hot yoga lying on your back or your right side
1. Bound Angle Pose (Baddha Konasana)
The butterfly stretch boosts circulation, stimulates your digestive organs, and promotes relaxation. It improves flexibility in your low back, hips, and inner thighs, which helps prepare your body for delivery. Sit on the edge of a cushion, block, or folded blanket, allowing your pelvis to tilt forward. Press the soles of your feet together. Bring feet in toward hips to deepen the stretch. Root your lower body into the floor as you lengthen your spine. Interlace fingers under pinky toes or place hands on your ankles or shins. Hold this position for up to 1 minute. Repeat 2–4 times. Modifications: Place cushions or blocks under your thighs or knees for support. Place a high stack of cushions behind you. Lie back in a supported reclined position, keeping your head elevated. It improves postural and body awareness and stretches your groins, inner thigh muscles, and front of your thighs .

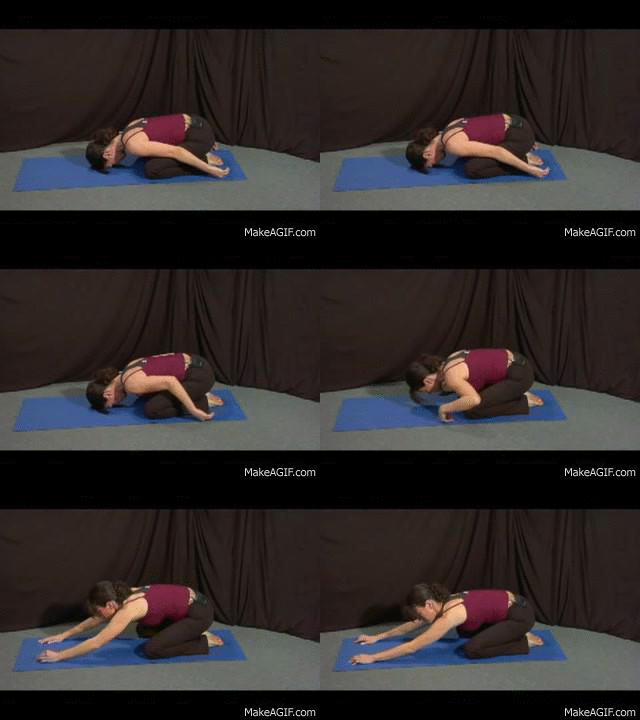
2.Child’s Pose (Balasana)
This relaxing pose stretches your shoulders, chest, and low back. It increases flexibility in your spine, hips, and thighs. Start on all fours. Touch big toes together and spread knees wide. Lower your hips back onto your heels. Reach arms in front of you. Breathe deeply. Hold this pose for up to 1 minute. Modifications: Place a cushion or folded blanket under your forehead for support. Widen your toes if you feel discomfort in your knees or need more space for your belly.Child’s pose gently stretches your spine, thighs, hips, and ankles. Along with deep breathing exercises, child’s pose can calm your mind, reducing anxiety and fatigue.

3.Triangle Pose (Trikonasana)
This strengthening pose gives you a burst of energy while relieving neck and back tension. Stand with feet slightly wider than hips. Turn left toes forward and right toes in at a slight angle. Raise your arms so they’re parallel to the floor with palms facing down. Reach left hand forward as you tilt your hip to extend your torso forward. Place left hand on your leg, the floor, or a block. Extend right arm up with palm facing away from your body. Hold this pose for up to 30 seconds. Repeat on the other side.

4.Standing Forward Bend (Uttanasana)
This pose relieves tension and promotes inner calm. Stand with feet slightly wider than hips. Hinge at your hips to fold forward. Keep knees slightly bent. Place hands on the floor or a block or hold opposite elbows. Hold this pose for up to 30 seconds.Hinge forward from the crease at the front of the hips, moving the pelvis and sacrum together, to protect the lower back.Standing Forward Bend calms the brain and helps relieve stress. This pose also stimulates the liver and kidneys, and stretches the hamstrings, calves, and hips.

#Third trimester yoga poses
Because your baby is now taking up more space, you may have more difficulty breathing and moving with ease. Take it easy, move gently, and rest as much as you like. In the third trimester, you should avoid: intense backbends, twists, and forward bends strong or forceful abdominal contractions inversions (unless you’re very experienced) jumping, hopping, or bouncing hot yoga lying on your back or your right side arm balances squats if you’re prone to prolapse
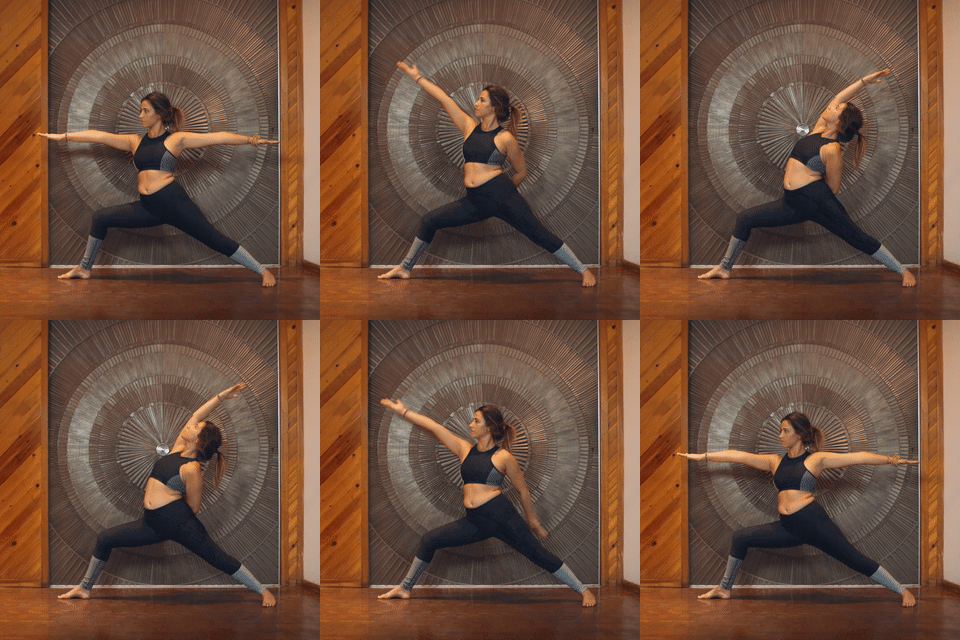
1.Warrior II (Virabhadrasana II)
Warrior II improves circulation, strengthens your whole body, and opens your hips. It also relieves neck and back pain. This pose allows you to experiment with your center of gravity as you align your body. From standing, step left foot back and turn toes out to the left slightly. Align the inside of left foot so it’s in line with right heel. Open your hips to face the side. Raise your arms to be parallel to the floor, with palms facing down. Bend right knee, making sure it doesn’t extend past your ankle. Gaze over your front middle finger. Hold this pose for 30 seconds. Repeat on the other side. Modifications: Do this pose next to a wall for support. Place a chair under your front thigh. To reduce the intensity, decrease the bend in your front knee, shorten your stance, or step your back foot out to the side slightly.The standing posture opens your hips and strengthens and stretches your legs and ankles.

2.Garland Pose (Malasana)
This deep squat opens your hips and boosts digestion. Avoid this pose if you’re prone to prolapse. Stand with feet slightly wider than hips and toes turned out at an angle. Slowly bend knees and lower your hips. Lift your heels or place them on the floor. Press palms together at the center of your chest. Press elbows into knees. Hold this position for up to 30 seconds. Modifications: Sit on a block or stack of cushions for support. Position yourself near a wall or chair for balance. Place a folded blanket under your heels for support

3.Easy Pose (Sukhasana)
This classic seated pose lengthens your spine, opens your hips, and promotes mental clarity. Sit on the edge of a cushion, block, or folded blanket, allowing your pelvis to tilt forward. Cross right leg over left leg. Place hands in any comfortable position. Close your eyes and breathe deeply. Hold this position for up to 1 minute. Repeat on the other side. Modifications: Place cushions or blocks under your knees for support. If it’s more comfortable, place one leg in front of the other. Sit with your back against a wall to support your spine. Easy Pose may also help lower or regulate blood pressure.

/yoga-poses-to-avoid-during-pregnancy-5181459-notext-FINAL-108d1fec65d54477a71cfc88a561cb2d.png)